How to Create an Expense Tracker in Excel: A Complete Guide

Introduction
Keeping track of your expenses is one of the best ways to maintain financial health. Whether you want to stick to a budget, save for the future, or understand where your money is going, an expense tracker is an invaluable tool. One of the best ways to create an expense tracker is by using Excel, which is both powerful and easy to use. In this guide, we will walk you through the steps of creating a personalized expense tracker in Excel.
Why Use an Expense Tracker in Excel?
Excel is an excellent tool for managing expenses for several reasons:
Customization: You can tailor the tracker to suit your specific needs, whether for personal or business use.
Automation: Excel’s functions and formulas automate calculations, making it efficient and time-saving.
Analysis: Excel allows you to analyze your spending through functions like SUM and AVERAGE.
Visual Representation: You can create charts and graphs to visually track and analyze your expenses.
With that in mind, let’s dive into how to create your own expense tracker in Excel.
Get Your FREE Expense Tracker Template Now!
Simplify your finances and gain full control over your budget – Download instantly!
✅ Over 10,000 downloads and counting!
💼 Perfect for personal and business use.
🔐 We respect your privacy.
Step 1: Set Up Your Spreadsheet
Create Column Headers: In the first row, add the column headers that will help categorize your expenses. Basic columns you can include are:
Date: The date of the expense.
Description: A brief explanation of the expense.
Category: The type of expense (e.g., “Groceries,” “Entertainment”).
Amount: The amount spent.
Payment Method: How you paid for the expense (e.g., “Cash,” “Credit Card”).
Notes: Any additional details about the expense.
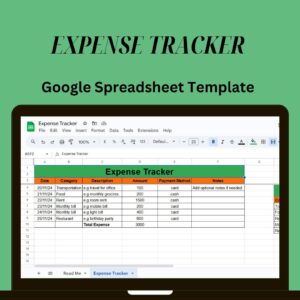
Your table should look something like this:
Date Description Category Amount Payment Method Notes
01/01/2025 Grocery Store Groceries 50.00 Credit Card Weekly shop
Resize Columns: Adjust the width of the columns so that all data fits neatly.
Step 2: Define Expense Categories
Categorizing your expenses will help you better understand your spending habits. Some common categories include:
Groceries
Dining Out
Utilities
Transportation
Entertainment
To make data entry more convenient, use Excel’s Data Validation feature to create a drop-down list for categories.
Select the cells in the “Category” column.
Go to Data > Data Validation.
In the Allow field, choose List.
In the Source box, type your categories separated by commas (e.g., “Groceries, Dining Out, Entertainment”).
This will allow you to quickly select categories from a drop-down list instead of typing them manually.
Step 3: Enter Your Expenses
Now that your spreadsheet is set up, it’s time to input your expenses. For each expense:
Date: Enter the date when the expense occurred.
Description: Briefly describe the expense.
Category: Select a category from the drop-down list.
Amount: Enter the amount spent.
Payment Method: Specify how you paid for the expense.
Notes: Add any additional notes, like “Business lunch” or “Gift for a friend.”
By regularly entering your expenses, you’ll have a detailed overview of where your money is going.
Step 4: Calculate Total Expenses
To track your total spending, Excel’s SUM function is helpful.
At the bottom of the “Amount” column, click on the cell where you want the total to appear.
Type the formula:
makefile
Copy
Edit
=SUM(D2:D100)
This will add up all the amounts in the “Amount” column (adjust the range if needed).
To calculate the total for a specific category, use the SUMIF function. For example, to calculate total spending for “Groceries,” use:
php
Copy
Edit
=SUMIF(C2:C100, “Groceries”, D2:D100)
Step 5: Visualize Your Spending with Charts
Excel allows you to create charts that visually represent your spending, making it easier to analyze. Some popular chart types include:
Pie Chart: Ideal for showing how each category contributes to your total expenses. Select the category data and their totals, then go to Insert > Pie Chart.
Bar Chart: Use a bar chart to compare spending across different categories. Select the relevant data and go to Insert > Bar Chart.
Charts provide a quick and easy way to understand your financial habits and identify areas for improvement.
Step 6: Set and Track a Budget
To manage your expenses better, set a budget for each category and compare it to your actual spending.
Add a Budget Column: Create a new column next to the “Amount” column called “Budget,” where you’ll enter your budgeted amount for each category.
Calculate the Difference: In a new column, subtract the actual expense from the budgeted amount:
Copy
Edit
=E2 – D2
This formula will show if you’ve stayed within the budget (positive value) or exceeded it (negative value).
Regularly reviewing this will help you adjust your spending and stay on track with your financial goals.
Step 7: Customize Your Tracker
To enhance your expense tracker, you can use additional features:
Automatic Date Entry: To automatically insert today’s date, use the formula:
Copy
Edit
=TODAY()
This will fill in the current date when you enter a new expense.
Conditional Formatting: Highlight certain expenses, such as those over a specific amount. Select the “Amount” column, go to Home > Conditional Formatting, and set rules to highlight values that exceed your budget or a specific threshold.
Step 8: Regularly Review Your Tracker
To make sure your expense tracker stays relevant, update it regularly. Set aside time each week or month to enter your new expenses and review your spending trends. This will help you make necessary adjustments and stay on top of your financial goals.
Conclusion
Creating an expense tracker in Excel is a straightforward and efficient way to keep your finances in check. By categorizing your expenses, calculating totals, setting a budget, and visualizing your spending, you can make informed decisions and manage your money better. Excel’s powerful features give you full control over your expenses, helping you stay organized and on track with your financial goals.
Start using an expense tracker today, and you’ll quickly see the benefits of better financial management.
Get Your FREE Expense Tracker Template Now!
Simplify your finances and gain full control over your budget – Download instantly!
✅ Over 10,000 downloads and counting!
💼 Perfect for personal and business use.
🔐 We respect your privacy.